So check this out, the Nashville quilt is quilted, bound, and washed. All nice and puckered and ready for its adventure through the US postal system to its new home with my brother and his wife in Nashville. I know this picture is dark but it shows the quilting. I have to brag, I am so proud of the quilting. I did FEATHERS!!!! (at least I think they're feathers) I looked through some books, poked through the internet, practiced on some scrappy stuff, and went for it.
 I discovered some tricks that really helped me so I thought I would tell you how I did it. I have trouble getting pictures in the order that I want them. I wish I could click and drag them around but I guess I can't. Anyway, I will refer to this picture a little later, for now just enjoy the view,lol.
 Look at this! Not perfect but awesome for me. I put a feathered circle in each of the four large corner squares. I was so nervous because there wasn't any print on the fabric to hide any sloppy stitching. I found a quick and easy way to mark it, practiced ONCE and was ready to go.
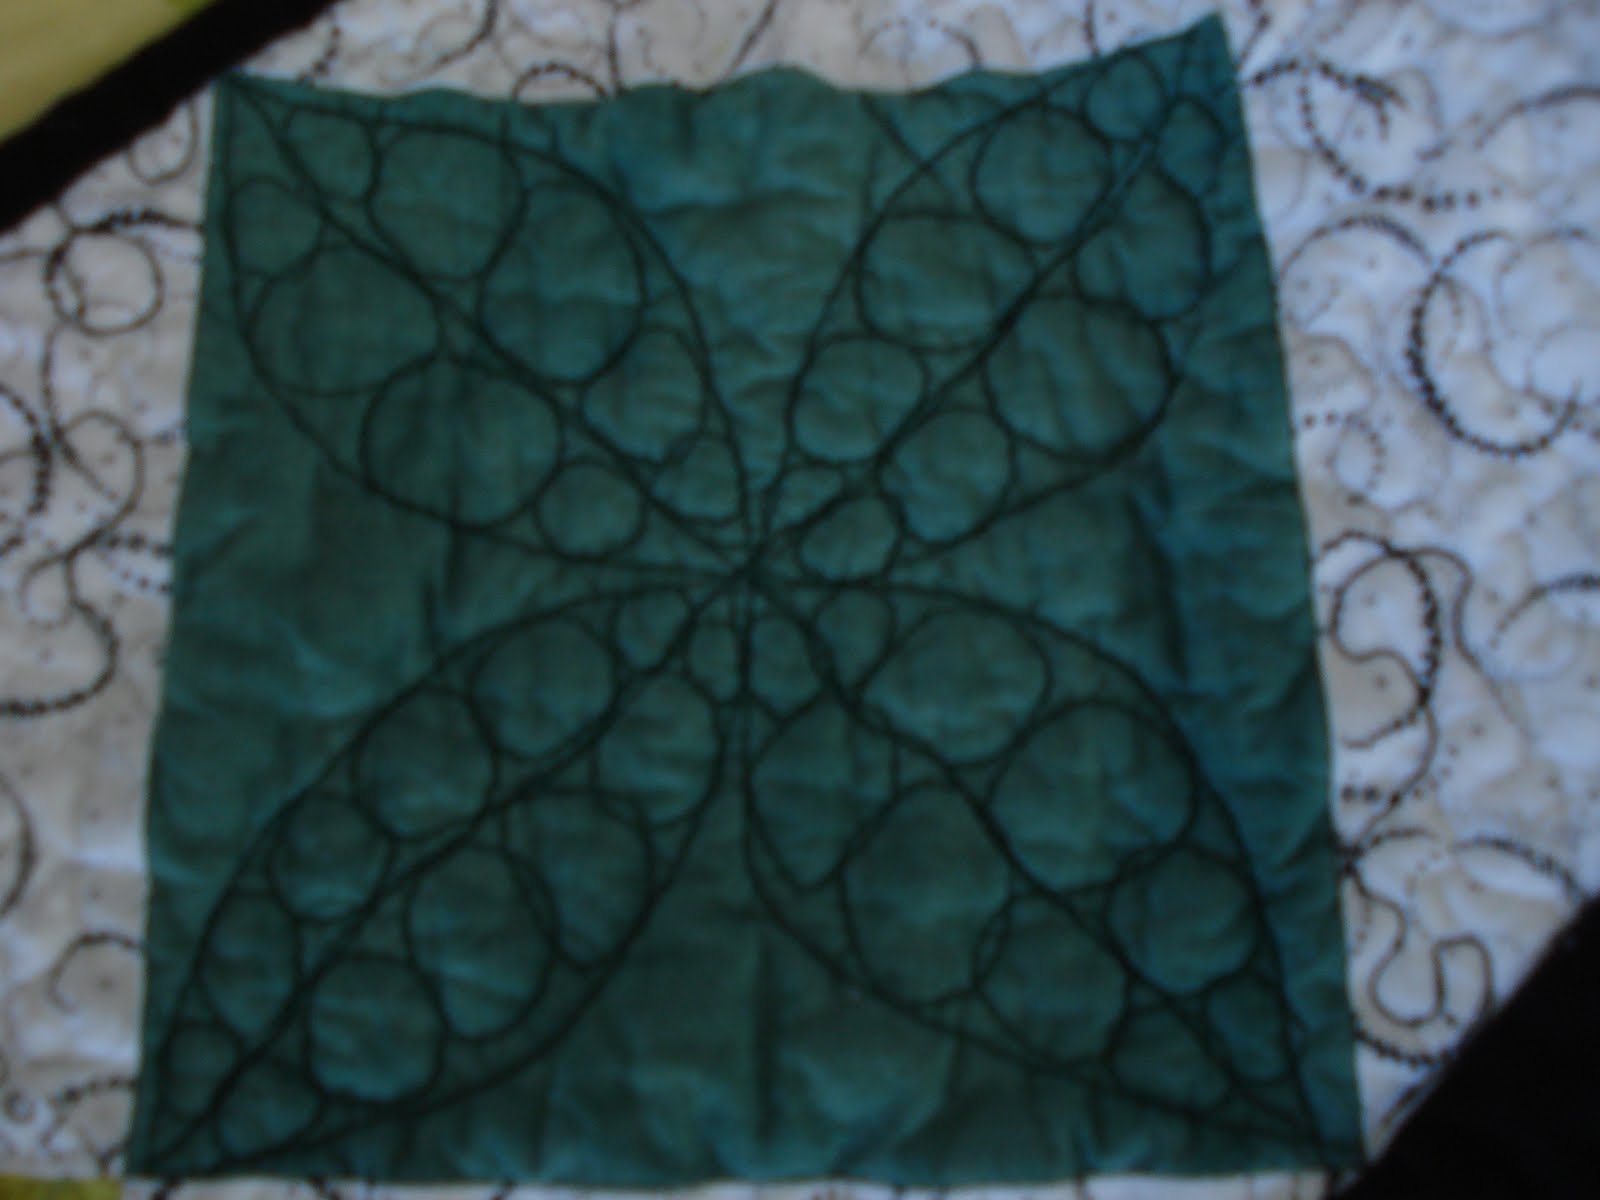
 If you look close, you can see what I did. The photo below is before the quilt was washed. You can see the chalk lines of circles I made. That's the only marking I did, three circles. This center line is the 'spine' and I found it helpful to sew around that entire circle first. Then I made the feathers, first going around on one side of the spine then around on the other side. I didn't worry about size, the only rule was to reach out and try to hit but not go over the other line. Just going out that far seemed to keep the feathers about the same size. When I got close to the starting point, I tried to gauge how many and how big to make the last few feathers so they would fit. I definitely got better by the last block. And I found that I did better in some directions than others and I turned the quilt to stay that direction.
 For all of the little blocks in the border, I did something a little different. You can see the chalk marks below. I marked all the halfway points then, using chalk, I just drew freeform the four petals. That's all the marking that I did. In all of the blocks, I stitched different fillers inside the petals. For feathers, I just stitched a 'spine' first, down the middle of the petal. Then I used the spine and the outside lines for my boundaries.
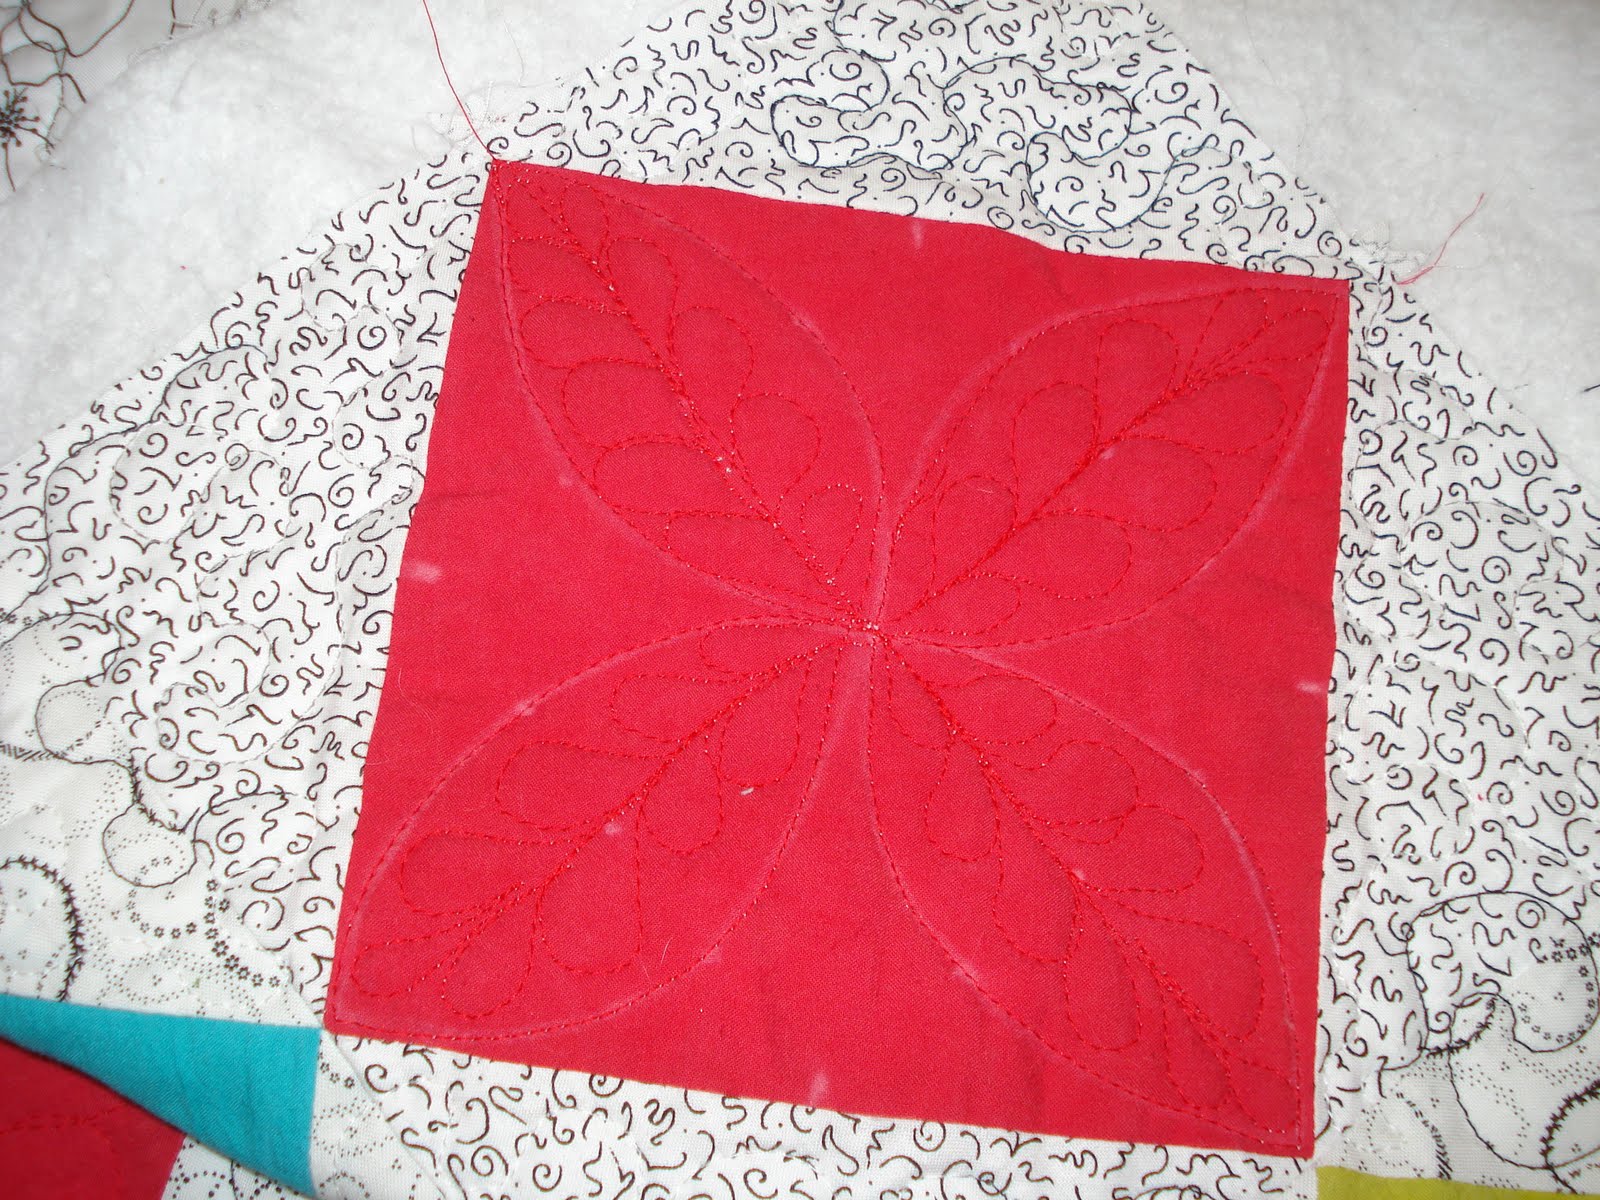
On this block below, you can see that the marking is the same but I used a different filler. No spine, I just zigzagged up and back.

Here is the same block after washing. I love puckers. They hide so much plus they make the quilt look so soft.

I had fun just making up fillers. Curly-q's (I'm sure that's not a legal spelling but you'll have to live with it.).

These were just wavy lines up and back. Very easy and I like how they look.

These look like pebbles but it isn't. I actually did figure 8's down the petals.
Some feathers. I think this was my first little block because I definitely got a little better.

This isn't very easy to see. I was going for flames, sort of. It probably just looks like veins in a leaf. Still works for me, though.

If you go back to the half-square triangle now. I did not mark those at all. Instead, I started by stitching a spine from one small point to the other. I tried to curve to stay somewhat central. Then I just used the outer triangle edges and the spine as my boundaries. As I got towards the center, I had to get kind of big and then gradually small again. It worked out pretty well.
This was a lot of fun and it really reinforces the truth that, with free motion quilting, you just need to practice, practice, practice. This gives me lots of confidence to quilt larger quilts. If I approach them one block at a time, it's not too intimidating. I'm not against having someone else quilt some of my tops on a longarm but I really like knowing that I did the whole thing.
And guess what? I put a major dent in my xmas shopping. The California crowd is pretty much taken care of. I'm going to hit the post office tomorrow, then I shall turn my attention to my daughter's birthday on Friday. I haven't gotten her anything yet and the poor gal sent me a text today that she's sick. There is some head cold/sinus misery that is wrecking havoc in town. Why do college students always get sick during finals?
At 11pm tonight, I get off work and will have off for FIVE days. woot woot! I plan to spread festivity all over the house. But first I'm going to sleep in. Night night everybody.
WOW!! Practice makes perfect! These examples look GREAT!
ReplyDeleteGreat job with the quilting! I like the curly q's bestest!!
ReplyDeleteThat is a lot of gorgeous stitching! And such a bright happy quilt.
ReplyDeleteBeautiful!! Once I get settled I will have to try again to learn how to do that!! Thanks for the motivation to try!
ReplyDeleteLove it!
ReplyDeleteYour quilting is gorgeous! Oh, I'm sure this quilt will be treasured.
ReplyDeleteI just love this! Don't you just love how a quilt looks after washing it? I never preshrink my fabric on purpose so it looks this good. Wonderful job! Love it. Steph
ReplyDelete